Monday, July 29, 2013

Where Did Summer Go?

It seems we're never happy....too hot, too cold, too humid, too rainy....but really where did the warm weather go?

It certainly makes it easier to craft knowing that we aren't missing lovely sunshine, and with a number of birthdays coming up there were a few cards to be made and mailed.  


This coming Saturday we have our second All Day Card Class with some  17-18 ladies.  Can you imagine by the time we're finished there will have been almost four hundred cards made in these two classes.  

Would you like a sneak peek of one of them?  
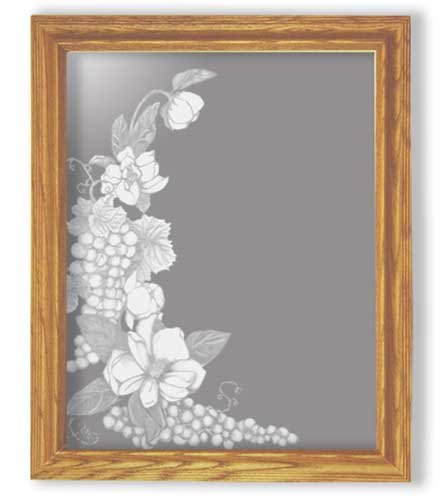
They'll all be shown after this Saturday, but in the mean time here's a peek at three of them.


Linda's been busy putting together some jewelry  kits for you

Two beautiful bracelets, this one is called Celestial Crystals and is very quickly assembled and more stunning in real life than the photo shows.  The gold finish on the square beads gives a regal finish to this piece and the kit is only 
$10.00 plus an hour or so of your time.

This one is a double stranded bracelet in the shape of butterflies
Originally made with Swarovski Crystals, we made it up with glass bicones and rondelles to keep the cost down and yet in lovely summer colours,  the beauty still shows through don't you think?

You can find the tutorial here and for just a couple of hours of you time you can make this beautiful bracelet.  
The kit is ready at the store for picking up for only $12.00.

It would be relatively easy to make matching ear rings too.


I'm sure you'll recall the clipboards I showed you last week that daughter Sandra and grandson Jonathan made for his teachers. 
If not, then you can either scroll down to last weeks posting to see them  or click here to see them again


Well a friend of the store was searching for some ideas for her children to make and she sent us a link to more clipboards where they not only decorated the board, but the clip too.  

Click here to see a YouTube video of them they're really quite cute.

Thanks Shaina for sharing these with us.


I  have to tell you a story about last week's card class.  We always tease the ladies when they are in class and change up the design of the card a little.  
Last week was no different,  but I  have to tell you how impressed we were with the change that was made to the card.  So much so that I asked if we could emulate it on our card, which now appeared unfinished to me. 


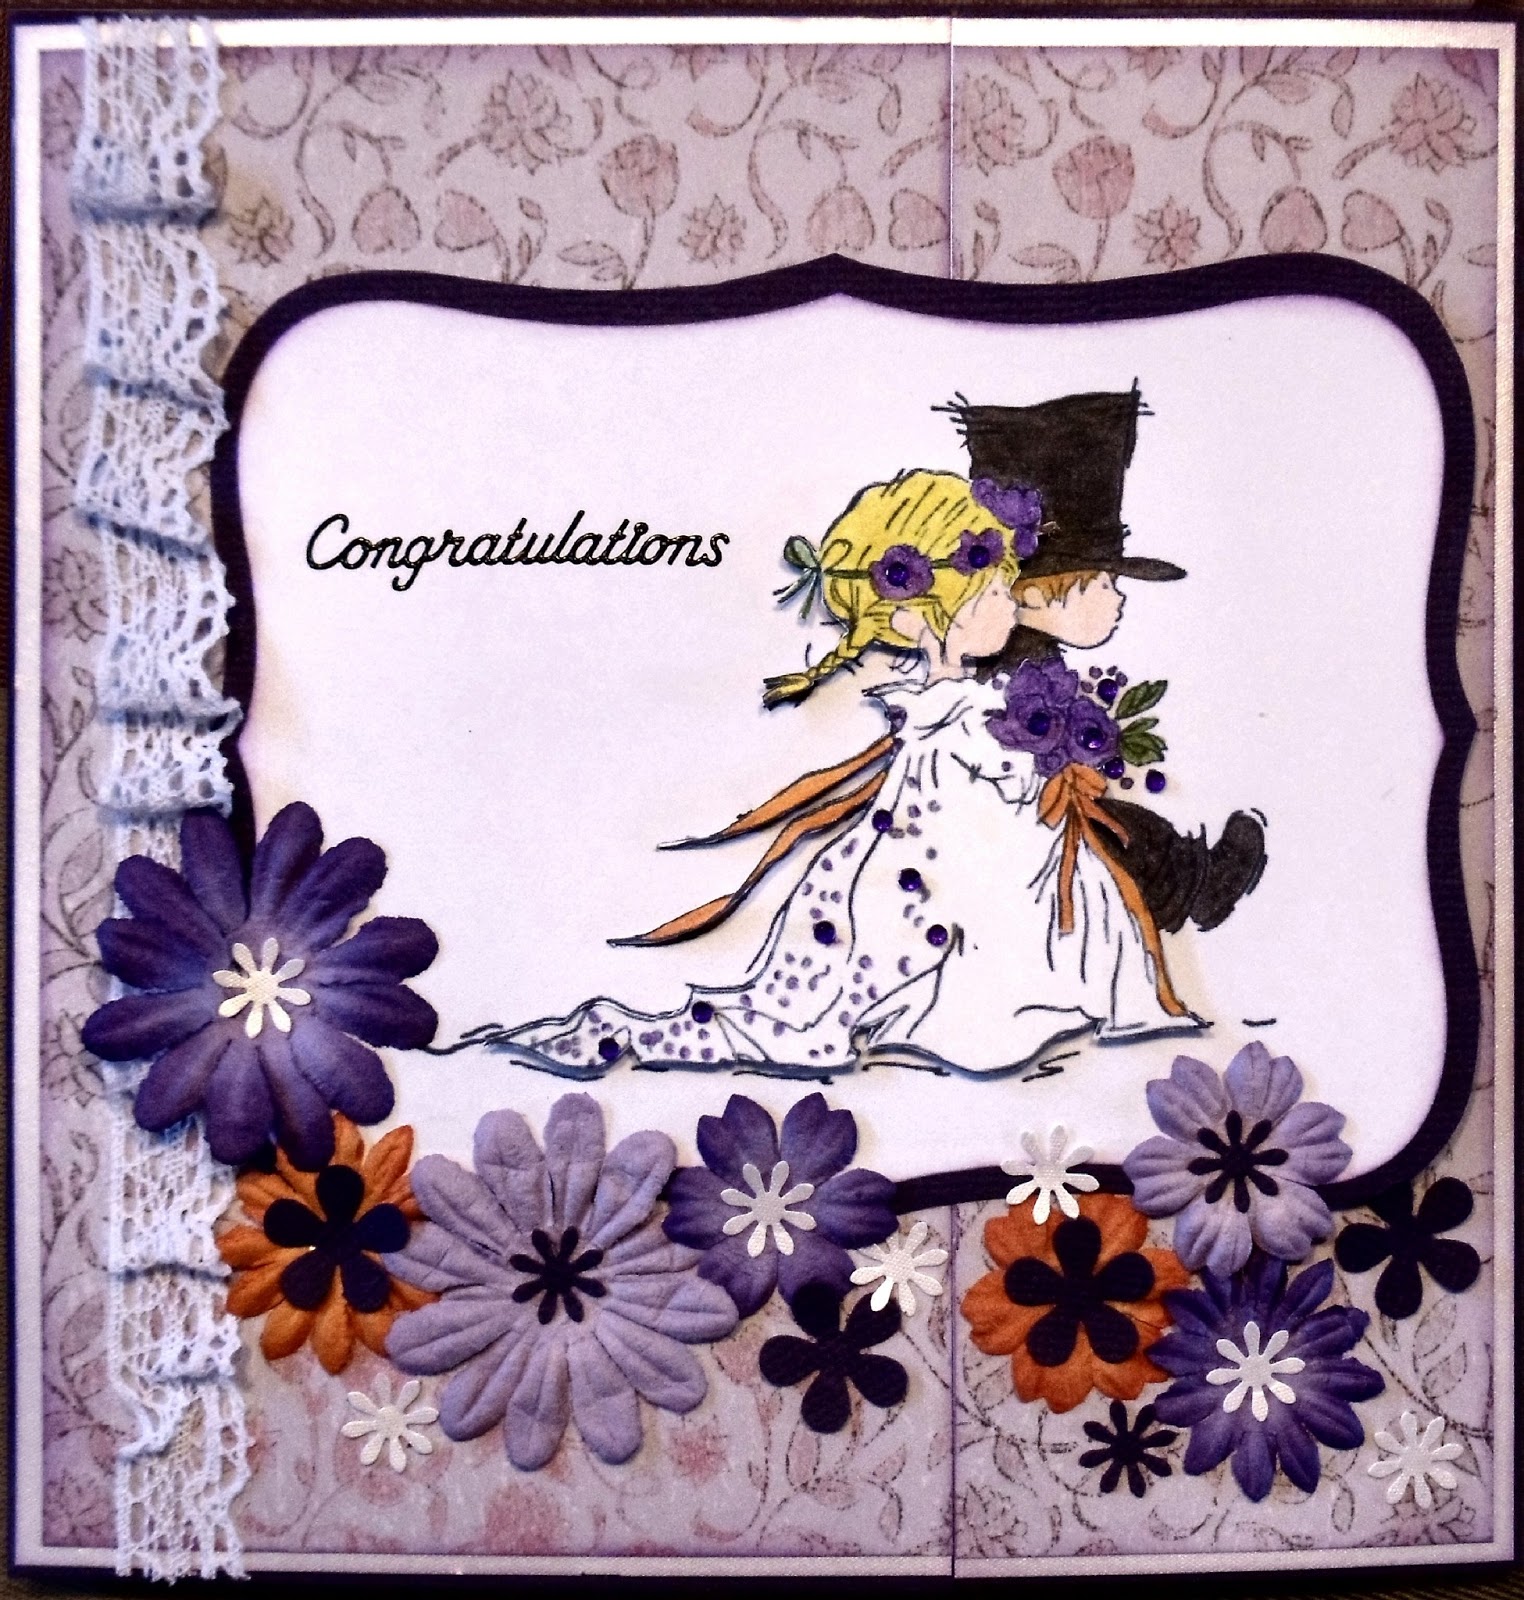
I had taken a photo of the card when I was finished with it the first time around and it looked like this.


Then I saw what Tammy had done to her card and which as I said, with permission I emulated.  Now it looks like this.


Can you see what a difference the white faux stitching around the outside of the card makes.  Thanks Tammy for your interpretation.

Linda mentioned to you in the newsletter that we are beginning to work on the Christmas Card Day Class.  Last week we plowed through some forty emails for new product coming out of the CHA exhibition that has just ended.  Many of these products won't be released for a few months, whereas some will begin releasing by the end of August.  
There were many, many companies showing their Christmas releases and we attempted to decide which we would bring into the store and which we would use for cards in the class.  It was no easy task I might tell you, but we were happy with the ones we chose.  Watch your newsletter in the coming weeks as we arrange a venue and date for these special classes.

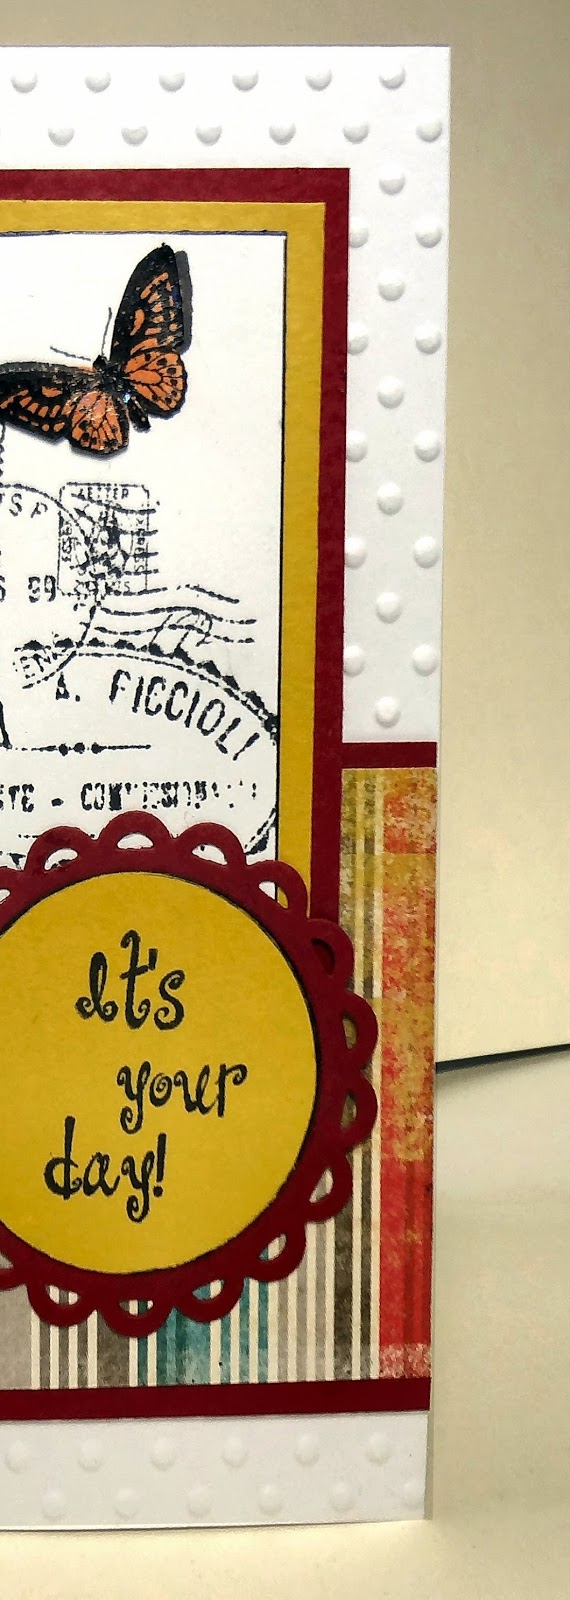
Here's my last craft for this week....really cute...really easy and what a great surprise if it was inserted into a birthday card.   I read about it too late to put in the cards I've just mailed!  
The blogger where I found it said she had received one as a child from an aunt in Canada and now as an adult she still thinks about the magic when she opened up her birthday card and this enchanting butterfly fluttered out. 

Photo 8


Here's a photo of some of her finished butterflies that she made to look like Monarch's.

I have to share this with you too, I'm not sure where I found it unfortunately as I didn't keep a record.  I'ts titled Words of Wisdom...you decide if it's a suitable title.

TODAY'S WORDS OF WISDOM..... 
When our lawn mower broke and wouldn't run, my wife kept hinting to me that I should get it fixed.  Somehow I always had something else to take care of first, the shed, the boat, making beer..  Always something more important to me. Finally she thought of a clever way to make her point. 

When I arrived home one day, I found her seated in the tall grass, busily snipping away with a tiny pair of sewing scissors. I watched silently for a short time and then went into the house. I was gone only a minute, and when I came out again I handed her a toothbrush. I said, "When you finish cutting the grass, you might as well sweep the driveway." 

The doctors say I will walk again, but I will always have a limp.

Finally I'd like to wish a Happy Birthday to my friend Edie. We don't see one another through the summer but I'm sure she will be back in the store come the fall and the beginning of her scrapbooking season.  
She's the one I often refer to as our "one only album scrapbooker."  A very talented scrapbooker that didn't know she was going to fall in love with the craft.  Happy Birthday Edie.

Until Later...Happy Crafting

Lilian


Tuesday, July 23, 2013

Royal Baby.

If  you watch even one news channel on TV, I'm sure you will have heard about the birth of the new heir to the throne.  A lovely bouncing boy as yet not named.  We had a new bouncing boy in our family recently, he arrived without the media hype, but still takes a very special place in our family.  

I began to wonder how different their wardrobes might be.  Would the new prince have sweaters lovingly knitted for him by a grandma?  

I was privileged  to see whilst I was in England earlier this year, a beautiful cabled sweater knitted for our new baby boy by his grandma.  The neatest thing about this sweater was that it was a duplicate of one knitted by my sister-in-law for her son.  So now father and son have beautiful matching sweaters to wear when they are out for walks together.

This line of thinking took me to my favourite knitting/crochet site at Ravelry.  
Are you a knitter or crocheter and you haven't found this resource yet? They have an amazing number of patterns and many of them are free for you to use, so hop over there and take a look.  When I was looking for patterns, there were 3,825 people looking at that site...can you imagine?


If you haven't learned to crochet yet but would like to, here's a blog that has some great visuals to learn .


Are you the lucky owner of a 
Silhouette Electronic Cutting machine? 

Whether you have or choose the Cameo or Portrait model, are you using it to it's full potential?  

Not only does it cut paper and cardstock, it cuts vinyl, fabric and much more. You can print with it, colour with it, make custom decor, temporary tattoos, scrapbook pages, cards, the list goes on.


What I want to mention to you today though is how you can use it to etch on glass.

By making your own stencil on your Silhouette, which you apply to a drinking glass, vase, dish, window, mirror or any other glass of your choice, you can change a plain ordinary piece into a work of art.


Along with your Silhouette you need some very basic supplies, such as a paint brush and of course the Armour Etch Cream.  Both of which we have in stock at the store.


Here are some ideas.  


If you find yourself taking one of your dishes to a pot luck meal, how clever is this to have your name etched onto it...no mistaking your pan then.


Vintage Elegant Cut Etched Flowers Heavy Crystal Glass Pitcher  Wine Glass with Etched butterfly      

Or for those upcoming Christmas gifts personalize a plain glass or jug to make it super special.  Either one would also be a lovely wedding gift too.


Or maybe you're feeling adventurous and would like the challenge of dressing up a mirror like this?

Whatever level of etching art you would like to try, drop into the store and we can show you a simple candle jar that we etched on and step you through the process


Here's another Christmas gift idea to get a head start on.  You know it's never to soon if you're a crafter and like to make your gifting personal.


A while ago now I mentioned to you about the clipboards that my daughter Sandra and her son Jonathan made for his teachers for the end of school year.

  
Here are the six boards that they made for his homeroom teachers, gym teachers, music teacher and school secretary.  Can you figure out which is which?


With some scrapbook paper, images cut on her Silhouette Electronic cutter, post it notes, cork board and a calendar, these  plain clipboard took on an entirely different look.

Aren't they not only delightfully personal, but totally useful too.
His gym teacher even had him sign hers.

Well I hope I've once again inspired you in some way to get busy with your crafting, or maybe try something new.

Until Later...Happy Crafting

Lilian

Tuesday, July 16, 2013

How Are You Managing in this Heat?

The heat seems to be on both sides of the world from what I hear from my overseas family.  We are maybe more fortunate as we have the lovely lakes all around us to cool down in.  Can't imagine living in a city during this heat.

I'm so thankful for the coolness of my craft room that enables me to create when the afternoon becomes to warm to sit out.

That's what I was doing this afternoon for a while.  Playing with felt, I created these lovely flowers.  The purple one I drew a five petal flower shape and then cut six of them out to create the flower.  The pink one I used a flower die and cut the felt with my Cuttlebug, again six shapes to make the one flower.  I also added a pearl in the middle of this one.

Simply fold the flower shape in half and then in quarters, secure it with a couple of stitches, or you could use hot glue. 
Place and stitch (glue) four of them together to make a circle and then the last two in the middle.  The leaf is just a long piece stitched (glued) behind.  You can add a pin or hair clip to the back if you choose.  They would make lovely hair pieces, foot sandals, brooches, decoration for a hat, ear warmers or shoe, decoration for a gift bag or wreath and I'm sure have many other uses.

Here are some ideas I found that you could expand on.

           Felt Flower Gift Topper


Here's another felt project I made last week.  Again using the squares of felt, but this time cut into rough circles and then spiraled to make a poppy shape.  Along with some beads sewn into the centres of the flowers, some embroidered stems and leaves it made quite an interesting wall hanging.  I haven't decided yet if it needs a butterfly on the left hand side...what do you think?  It's on display in the store if you would like a closer look.


Linda and her family were at a wedding on the weekend and having such girly girls of course wardrobes were coordinated in readiness for the celebration. 

Rachel needed a necklace to complement her outfit, so Linda whipped one up to match.  Here it is, isn't it lovely.  
Can you guess the colours that were in Rachel's dress?


Of course a wedding means a wedding card and before that a shower gift, so here's what Linda created for those.


Aren't they lovely too.

And you will gather from the personalised wedding card, the colours the couple chose for their special day.


Emily was a busy girl last week with Vacation Bible School and Library activities she enjoyed a very full week.
      
Here's the creative colouring page she made for Vacation Bible School.
She won for the most creative page and no wonder when you see the effort she went to.

Cotton balls for clouds.   Foil scrunched, coloured and glued into place for the Sea of Galilee.  And if you look really closely, those are real grass cuttings in the green areas!
What a great job.


My internet was down for a bit last week, so I didn't have as much surfing time to find some interesting "stuff" for you.  
However I did find this font for Tammy and all the lucky Silhouette Digital Cutting Machine owners. 
It's a free font that when you type the letters, instead of getting that letter you in fact get a shape that the machine will then cut for you.  
For example the letter "c" gives you a scalloped circle with a plain circle in the middle.  
So if you own either a Silhouette Portrait or Cameo, hop on over here to download the free font.

Don't own a Silhouette?  Drop into the store so that we can introduce you to these wonderful machines. 
Whether you choose a Cameo or Portrait, either one will cut so many different shapes that you buy for  just 99 cents, or make yourself.  

That means no more cartridges to buy!  

Not only that, but Silhouette gives you fifty free shapes with the purchase of the machine, and then they offer a free shape each week on their blog too.  And no, you don't have to be a computer techie to run this machine, it's very user friendly.
Talk to us about these lovely machines and we will show you how easy they are. 

Until Later....Happy Crafting

Lilian


Monday, July 8, 2013

Fun in the Sun.

Have you  found the perfect craft to enjoy during these sunny summer days?   We have many people who love to sit on the dock and make friendship bracelets whether knotted or by using the friendship weaving wheels.
Here are a few examples of braided friendship bracelets.  There are some great instructions over on this blog. 


Take a look here for a great friendship wheel YouTube video.  Above are some examples of patterns that you can create with the foam wheels.  

Pearl and crystal bracelet
Using these wheels you can add beads to your cords making very attractive bracelets like this one, which is called Kumihimo Weaving.

You can make any of these with embroidery floss or parachute cord, either of which we have in stock at the store.  We also have the friendship wheel kits that you see in the YouTube video.


Did  you look at the website from last week with the popsicle sticks on stretch canvas? 
Here's my interpretation of that craft.
I used a stretch canvas board painted dark brown, the larger popsicle sticks stained with a light brown paint. With scissors, I cut the rounded ends from the popsicle sticks and then cut them to varying lengths to create an interesting design.
Using both tacky glue for long lasting results and hot glue for instant stick, I adhered the popsicle sticks onto the board.
The finishing touch to the board was jute that I glued around the sides with tacky glue.


To decorate the front, I used scrapbooking word stickers and Jolees die cut trees.  Made a pretty nice summer wall art for the cottage I thought and a pretty simple craft to make as well.
All  the supplies are available in the store.
The sample is also there if you'd like a closer look.


Rachel was having fun on the weekend with paints and water colour paper. Her activity made me want to find you a tutorial using water colour pencils on a scrapbooking page. Seemed like a daunting task, but I Googled and came up with this.

An amazingly simple technique, but a really nice way of making letters for a title on a page.  Hop over to the blog to find out how to create this yourself.   Don't forget the same technique can be used on a card as well.

Linda was telling me of some people that she had in the store the other day.  They were actually vacationing in our area from Vancouver, where they own a paper crafting store.  As they were driving by they noticed our sign and the lady came in to "check us out".
Having chatted with Linda a little, she said she was going to send her husband in.   They had small children in the vehicle that they didn't want to bring into the store.
Apparently her husband is the one that teaches the card classes at their store and she was so impressed by what she saw in our store that she wanted him to see the cards that we offer to our customers.


Have you registered for the All Day Card Class yet?  Although the first class is full, we have a few spots left in the second class on Saturday August 5th.  Each  of the cards are quite different techniques and are a good mix which I'm sure will be enjoyed.
It's a great time to spend with fellow cardmakers enjoying the same craft that you love.  

So if you're thinking of joining us, don't delay much longer and miss your opportunity. As these words say, your second chance is tomorrow, so call and get registered.


As a little tease, let me tell you that we will be playing with distress inks, using vellum, creating fancy fold cards, fun birthday cards, elegant wedding or anniversary cards.....something for everyone....see you there.


Until Later....Happy Crafting

Lilian


Monday, July 1, 2013

Are You Ready?

In just a few short months it will be Christmas, have you started on your Christmas gift giving list?
No I haven't either, and of course before that we have the Fall Fair and loads of categories that you may want to enter into. 
Donna once again dropped off the booklets for both Youth and Adult categories, so don't be shy, she's more than willing to bring extras into the store for us, pick up your copy and get started in lots of time.

Well last Tuesday we enjoyed a great evening at the school when both Jonathan and Rachel graduated.  (Did you guess from the cards I posted last blog what they were wearing?).

With something like sixty young people graduating and an evening cruise planned for them, the administration were well organised.  

Both Rachel and Jonathan had set themselves goals at the beginning of the year.   They both wanted to be on the Principals Honor Roll and Rachel wanted to win the music award.  How exciting it was for both of them, and of course their families, when they found they had achieved their goals.


Once again Linda's outdone herself with the lovely grad cards she made for both Rachel and Jonathan.
Notice how she took the Peel Off Greeting sticker, coloured it black with her Identipen and on Rachel's card eased it around the Spellbinder oval mat.
And how about those lovely big "googly" eyes, don't they just put the finishing touch on Jonathan's wise old owl card!


Did you love the teacher gifts that Linda, Rachel and Emily made for their teachers this year?  (Posted in the newsletter)
Some were quick and easy gifts, but I really liked the canvas word art boards they made for one of the french teachers and the music teacher.  I'll leave you to figure out which board was for which teacher.


I saw another great idea for word art using plain old crafting popsicle sticks on stretch canvas.  You could use canvas board, or even a wooden board to do this as well.
These are the basic steps.
Starting with some popsicle sticks and canvas cut the popsicle sticks to different lengths and arrange them into a pattern that you like.  Something like hardwood flooring.
Stain the sticks either by using a thinned paint, or as this blogger did, a tea bag stain.

Paint the canvas in a brown, or other dark colour so that any gaps won't show through as being white.
Glue the popsicle sticks onto the canvas in your predesigned pattern.
Now your ready for your word art.  If you're the lucky owner of a Silhouette digital cutter, then you could make your own stencil and paint your word art onto your popsicle stick canvas.
The finishing touch was to hot glue jute around the edge of the stretch canvas to give it a lovely nautical look.
Hop on over to Pitter & Glink's blog to see more directions and the finished look.


How about this for a neat embellishment
on a scrapbook page.  

strip flowerOften after I punch out a flower, I think....hmmm, that's a bit ho-hum, now what can I do to dress it up a little.  

I came across this idea on a blog that I thought really dressed up a plain punched flower.
By simply cutting strips, folding them over and topping off the flower centre with another punched flower, ho-hum became interesting.  
Make sure you put a dimensional dot in the fold of the strip flower to prevent it from collapsing.  Hop on over to the blog to see how the embellishment was used on a scrapbook page.


And to leave you crafter's tonight, here are some inspirational words to keep in your mind if you feel the need to justify the time you spend crafting.


We all know that women as carers in some form or another need to look after themselves to be able to look after others.

Until Later....Happy Crafting

Lilian