Monday, May 27, 2013

How are the Black Flies in Your Area?

I've been spending a good bit of time in the garden the past few days creating a new garden bed and the flies have been all around, but thankfully not biting.  Pretty much done now thank goodness because it's much harder work creating the bed, than making the decision to have one!

We had a lovely family dinner last night with the two exchange students who are here from Quebec.  Can you imagine eleven people all talking at once and for two of them English is their second language!  Wow, I was impressed with how much they actually understood even though at times they struggled for the English rather than French word. Jonathan's twin has quite the sense of humor and enjoyed giving Linda a bit of a hard time over her strawberry and rhubarb pie.
Can you picture their arrival at Monck School Sunday night.  Two classes as well as parents from Bracebridge outside the school holding a huge welcome banner as the bus from Quebec arrived with the "twinned" students and chaperons.  I think Linda told me there were about 100 students in total.  What a week this will be for them and such a lovely culmination to the french immersion program for our Bracebridge students.


Anyway...as to crafting.  What have you been doing lately?  My dear sister in law Diane has recently learned from her crafty friend along the street how to Zentangle.  Have you done that?  It's really just a fancy name for doodling, but you can create some beautiful work with it.  Here's Diane's first attempt at Zentangling. As you can see from her sample on the right, you divide a shape into smaller spaces and then fill those spaces in with a variety of different doodling designs.  


Diane found it quite relaxing.  However when we created a Zentangle card in a card class back in 2011 some of the ladies were quite intimidated by the style.  It's sometimes hard to relax and let go as you just doodle.  


With this card on the left, we doodled a shape that was divided into seven smaller spaces and then cut the finished piece using a Spellbinder Circle die to create a large circle that we matted on black.  My pen of choice for this work is the Micron fine tip pen.

Why don't you give it a try either using these samples as a jumping off point, or Google a Zentangle search using images.  There are so many ideas out there to get you started.  Would love to see what you create too.


Are  you a paper crafter that wonders about the electronic die cutting machines?


We are often asked which is the best machine on the market to purchase.   We lean toward the Silhouette Cameo or Portrait that we sell in the store for a number of reasons, not the least is that you don't have to purchase expensive cartridges to cut your shape. 


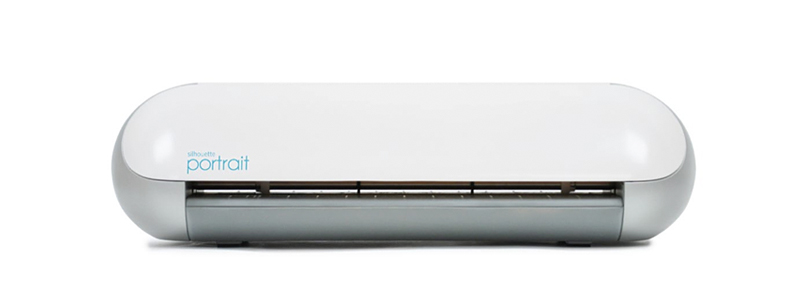
I was interested recently to stumble across this blog here where 47 crafters posted their views on the Silhouette versus the Cricut.   

If you are considering a purchase this is a must read post and then drop into the store to arrange a demonstration of the Silhouette Cameo, because yes, that was hands down the most popular choice.


Are you a jewelry maker that yearns to make something a little different?  How about making a wire bead.

I came upon this lovely piece recently and was quite taken by how unique the wire bead hanging from the ring was and how easy it was to make.  
Natalie, the Australian blogger, has written a very easy to understand tutorial that will have you making many of these beads.  You will find her tutorial here


Well hopefully I've inspired you to try a craft or two, or just perhaps tickled your interest in looking into one. Which ever it is, never say "I'm bored".  There are so many crafts available to us those words should never pass our lips.  
Certainly Linda was somewhat taken aback today when she was in the store after a weekend off for dance competitions with her girlies (more high awards for their dance studio...way to go Meagan and Tammy for the way you inspire these young dancers to reach such heights).  

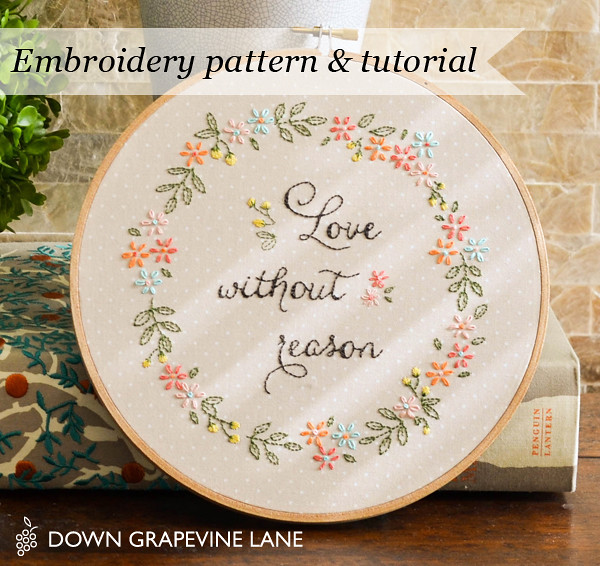
I digress though.  I was going to tell you how taken aback Linda was to find all the needlework pillowcases and dresser scarves sold!  
We have a needle artist in Alberta who is unable to purchase these around her area, so periodically her niece, who lives locally, comes into the store buys everything we have in stock then sends a care package to her aunt.  
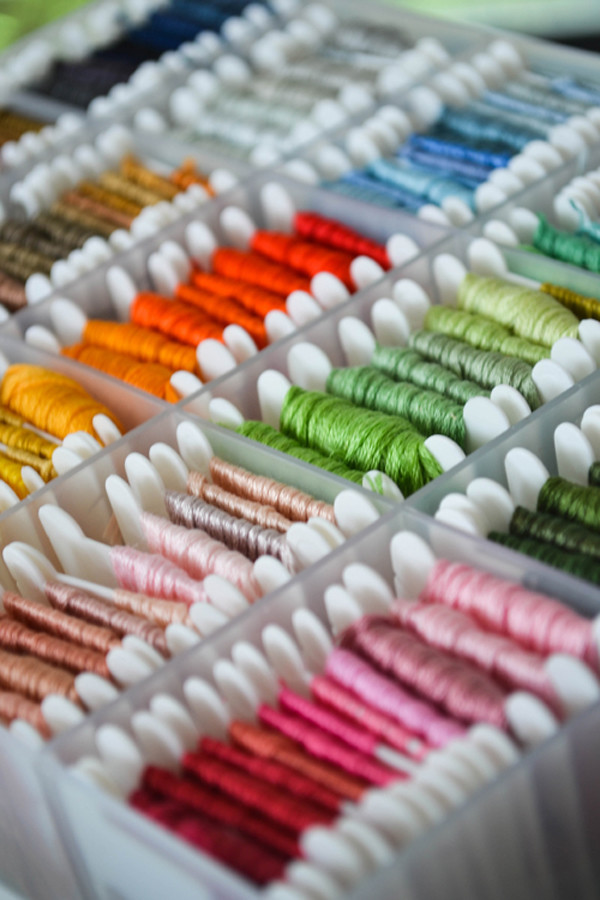
So if embroidery is your craft of choice, we are placing an order today to refill that empty wall space as quickly as we can.

Until later...Happy Crafting

Lilian


Tuesday, May 21, 2013

Here or There?

Definitely here, because in the end, there's no place like home wherever that may be.  We (or at least my dear husband) drove over 1,000 miles whilst we visited many of our family in England and that didn't include all those extra miles we traveled with family as they showed us points of interest around where they live.


Even given the colder weather, we enjoyed strolling around Stratford upon Avon seeing the birthplace of the bard, William Shakespeare, born on April 23rd 1564.  Then walking past the site of the home where he died on April 23rd (the same date he was born)1616, and finally going on to the Holy Trinity Church where he is buried.    


Stratford upon Avon and England as a whole is rich in a history that we here in Canada don't have the opportunity to see.  Certainly our "touristy" visit around London enabled us to see many historical places such as the Tower of London, Westminster Abbey and St Paul's Cathedral to name a few.   
It was indeed a wonderful holiday seeing our family along with many parts of England and Wales.  We were happy to meet a new member (since we were there last) of the family, Sonia, as well as meet one of our  newsletter readers from England, Cathy.  Lovely memories.


But now of course it's back to a more normal routine, though I did get the opportunity to craft a little whilst on vacation.  A couple of evenings were spent showing my dear sister in law Gill some Cuttlebug and stamping techniques.  She has such a lovely card making style and no-one around to craft with.  Did I ever show you the beautiful card she made for our 50th anniversary recently?  Using Peel Off stickers and a simple design she created a beautiful card didn't she.


I also had the opportunity to sit under the tutelage of another dear sister in law Diane as she showed me the technique of encaustic art.  What a simple and yet very interesting technique this is, and certainly a much better use of an iron than the more boring one of getting creases out of clothes!

 I was going to show you the beautiful gift that Rachel had made for her cousin Jessica, but don't have photos on hand right now, so you can look forward to seeing that next week.

DSC_0993-2 600px
Have you ever tried or thought you would like to try the art of embroidery?  I came across this lovely design that would make a great first embroidery piece.  The blogger, Sedef, designed this piece herself for Mother's Day.  She also gives an excellent tutorial to help you achieve the finished result   Here's the link to her blog.


The design could easily be transferred to your fabric by using the Pilot Frixion pen that I mentioned to you a few weeks ago, and which is available at the Craft Nook. We also have a full selection of DMC embroidery floss to choose from, along with embroidery hoops.  Why not give it a try?


:)
Did you hear or perhaps read about the news?  Our talented musicians from Monck Public School won a gold medal at the Canadian National Musicfest in Toronto last week.  Rachel and Jonathan are both part of this band and were away for a couple of days last week as they participated in the Festival, had an opportunity to learn more from the workshops and also had time around Toronto with their fellow musicians. 


And a couple of photos featuring Rachel and Jonathan from when the band was performing recently at the Rene Caisse theater.


Rachel performing her solo accompanied by their dedicated and talented teacher Mrs. Lonsdale. What a driving force she has been this difficult school year not only getting them to the Nationals, but bringing them to the point that they won a gold. 
Hat's off to Karen Lonsdale a teacher of excellence!


And below Jonathan as he performs with the band


And then last but not least the missing third card that Linda mentioned in the newsletter that she'd had some "technical difficulties" with.
Using a stamp set that has this motor scooter, greeting and flowers in it as well as grass that we didn't use, this was one of  the cards that were created in class .
Note the pearls that started off as white, but were altered using an orange Identipen to suit the card,


Until Later....Happy Crafting

Lilian

Tuesday, May 14, 2013

Graduation Time Is Here!

     Do you have someone special graduating this year?  "Sadly" we will be celebrating the grade eight graduation of both Rachel and Jonathan.  Where has the time gone?  It doesn't seem like that long ago that they were in kindergarten and Bumpa had to peel Rachel off of me to put her on his bus!

     But while the graduates are getting excited and shopping for the perfect outfit it is time for us to get working on their cards of congratulations! 


tassel-tut-card-520-wm-notime.jpg

    When we think of graduation we often immediately think of a cap and tassel.  But where can you find a tassel?
 
    Click HERE to link to a great tutorial I found that will teach you to make your own tassel - and making it yourself, you can make it in the appropriate school colour!
     This is a photo tutorial so be sure to click on the photos for a larger view.  You'll see when you visit this link that the shape cut out of the template was made with a paper punch - don't worry if you don't have something similar because you can easily freehand the same basic shape and cut it with scissors.  The accuracy of this shape will have no effect on the quality of your tassel.  While the tassel being shown was actually made with crochet cotton you can most certainly get the same results using DMC embroidery floss - stocked at your local craft store!
 
     Is your embroidery floss organized?  If you are a very avid stitcher you may be spoiled enough to have an entire chest of drawers in which to store your floss.  However, most of us crafters keep our skeins wrapped on bobbins in a plastic floss box. 


    But which is the best bobbin to use to wrap your floss?  This is an ongoing debate - cardboard because you can write on it, or plastic because they last longer?  My favourite has always been plastic. Click HERE for some great tips on floss storage.
DSC_0680-2 500px
 
 
                                                                                            Here are some more graduation card ideas to inspire you to make tassels!
      Look closely at how this card makes great use of your Spellbinder Nestabilities dies! (Plain Circles, Scalloped Circles and Labels 8)


     And finally, if you're looking for a card that will hold a gift card inside of it then Click HERE to link to the Hero Arts Blog for complete instructions for this folded graduation cap card!

Happy Crafting!
 
Linda


Tuesday, May 7, 2013

Mother's Day or Mothering Sunday?

     Here in Canada we will soon be celebrating our Mother's Day.  But did you know that in the U.K. mothers were recognized on Mothering Sunday back in March?
 
     In my opinion, no matter when we celebrate, "Mothering Sunday" seems to be a more appropriate name for this holiday.  I am very fortunate to have a mother with whom I have always been close and, she would agree, with whom I have rarely if ever quarreled.  However, this isn't true for everyone and unfortunately many of us are now without our mothers.  This Mother's Day acknowledge all of the women in your life who have a mothering influence - sisters, friends, aunts, teachers, neighbours. 

photo cubes

     Whomever they are we need to thank them for the love they show us - what better way to do that than with a craft project!  


     These quick and inexpensive photo cubes by Tara Dennis are a perfect way to showcase these special women.

     Click HERE to link to Tara's blog for complete photo instructions.  Empty boxes, black paint, photos and just a short amount of time are all that it takes!
 
 
---------------------------------------------------------------------------
 
 
     If you are a regular reader of our blog posts you will recall this card that we made as our make-and-take project at our Mega Crop Weekend.  One of the techniques we were featuring was to create an ombré - a colour graduation from light to dark.
 

    To create our ombré we used one of our favourite Impression Obsession background stamps inked with Versamark Ink.  We then rubbed chalk pastels across the stamped image - the stickiness of the Versamark grabbed the chalk.  We then rubbed the image with scrap paper to burnish the chalk and remove any excess.
 

     Just days after our Crop Weekend, Hero Arts featured this same look on their blog!  The watercolour resist technique used by Hero Arts would require a few extra minutes simply because of the time involved in heat embossing and drying time.

bday_042413_reg


  Click HERE to link to their blog and watch a great video tutorial.  Even if you would prefer not to heat emboss, this video is worth watching for the watercolour tips.  (what were the chances that both our card and theirs would be in pinks!)

     So now you are all set!  You have both a gift idea and a card to create for the one who mothers you.  Too bad my mother chose to be away for Mother's Day!

Happy Crafting!

Linda


Wednesday, May 1, 2013

Mega Crop Weekend - Special Layout Class

     When registration begins for our Mega Crop Weekends we most always offer an Early Bird Special to the first fifteen scrappers to register.  Again for our Spring Crop, this special was a layout class and was full within the first morning of registration.

     Our layout class introduced our ladies to a quick style of scrapbooking that has been made very popular lately by scrapping gurus like Becky Higgins and her Project Life. This style uses 12"x12" page protectors with various arrangements of pockets into which you can insert photos and/or papers.  These pockets are designed to accommodate standard 4"x6" photos both horizontal and vertical.  We used two styles of these pages made by We R Memory Keepers.

     Also very popular with this style of scrapbooking are 12"x12" papers featuring journaling blocks, captions and patterned sections that can be cut apart and slid into the page slots.  For our projects we used two of these papers from Echo Park's "photo freedom" line. 

     Having cut our patterned papers to size and cut out our chosen blocks our ladies were ready to assemble their two-page layouts.  Given that this pocket style of scrapbooking was new for us, we chose to create a two-page layout that featured our regular style of layout along with one pocket page - that being the right-hand page.  (Remember that you can click on the photos to enlarge them!)


     Part of the beauty of a page is in the little details.  This page featured a large arrow leading from our word block to our journaling.


 Notice how this arrow was glue down to the page at the end and the point while the middle was raised with pop dots.  Also take note of the use of our scallop border punch as well as the negative piece that would normally be wasted.  Our ladies were a little less than thrilled with the doodled border around our circles (and some of them opted out of this-can you believe it!)


     The second layout in this class also had a pocket page as the right-hand page.

     Again we added some techniques into this layout including banners for our subtitle and a large circle embellished with dots of copper Stickles.  My favourite embellishments on this page are the copper buttons and felt flowers.  The buttons were originally a shiny silver. To create a textured button we inked the buttons with Versamark and heat embossed them in copper. Before the third layer of embossing had cooled we quickly pressed the button into a stamp.  but with a few layers of copper embossing powder and a stamp - aren't they impressive!

     Our felt flowers were much quicker to make so our ladies had the opportunity to make these themselves during our class.  From a felt square we simply started from the outside edge and cut a circle.  Instead of completing the circle, we continued to cut into the center creating a spiral.  This spiral is then wrapped from the center, tucking each layer behind the round before.  A little bit of Scotch Quick Dry glue on the tail and some beads in the middle and voila!


     As always pictures never truly do justice to the finished product so if you'd like to see these layouts in person please drop into the store!


Happy Crafting!

Linda