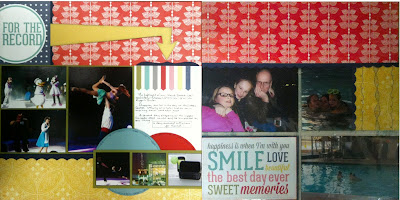
Our layout class introduced our ladies to a quick style of scrapbooking that has been made very popular lately by scrapping gurus like Becky Higgins and her Project Life. This style uses 12"x12" page protectors with various arrangements of pockets into which you can insert photos and/or papers. These pockets are designed to accommodate standard 4"x6" photos both horizontal and vertical. We used two styles of these pages made by We R Memory Keepers.
 Also very popular with this style of scrapbooking are 12"x12" papers featuring journaling blocks, captions and patterned sections that can be cut apart and slid into the page slots. For our projects we used two of these papers from Echo Park's "photo freedom" line.
Having cut our patterned papers to size and cut out our chosen blocks our ladies were ready to assemble their two-page layouts. Given that this pocket style of scrapbooking was new for us, we chose to create a two-page layout that featured our regular style of layout along with one pocket page - that being the right-hand page. (Remember that you can click on the photos to enlarge them!)

Notice how this arrow was glue down to the page at the end and the point while the middle was raised with pop dots. Also take note of the use of our scallop border punch as well as the negative piece that would normally be wasted. Our ladies were a little less than thrilled with the doodled border around our circles (and some of them opted out of this-can you believe it!)
The second layout in this class also had a pocket page as the right-hand page.
 Again we added some techniques into this layout including banners for our subtitle and a large circle embellished with dots of copper Stickles. My favourite embellishments on this page are the copper buttons and felt flowers. The buttons were originally a shiny silver. To create a textured button we inked the buttons with Versamark and heat embossed them in copper. Before the third layer of embossing had cooled we quickly pressed the button into a stamp. but with a few layers of copper embossing powder and a stamp - aren't they impressive!
 Our felt flowers were much quicker to make so our ladies had the opportunity to make these themselves during our class. From a felt square we simply started from the outside edge and cut a circle. Instead of completing the circle, we continued to cut into the center creating a spiral. This spiral is then wrapped from the center, tucking each layer behind the round before. A little bit of Scotch Quick Dry glue on the tail and some beads in the middle and voila!
As always pictures never truly do justice to the finished product so if you'd like to see these layouts in person please drop into the store!
Happy Crafting!
Linda


No comments:
Post a Comment