Tuesday, January 28, 2014

I'll Be There, Will You?

Are you joining us on Friday night to crop and craft?  We know it's cold outside, but it's warm inside once you get there, and full of chatter, laughter and creative fun.  
I plan to do some knitting this week. However I've found before that my plans often change as someone asks me to show them a "new to them" craft, idea or simply a tip or two on what they already know. Whatever I end up working on, I know that I'll go home at the end of the night having enjoyed the time spent with others.  So if you aren't already signed up, call or email the store and make it happen for you too.  Don't forget also that if you create a previous Basic Grey page that night, then you'll get the evening at half price! An already economical night out for half price...great deal methinks.

My sister in law shared a word saying with me last week after reading that I was going to be working on my PhD.  I thought I'd share it with all of our readers.  You can decide if it describes you, or close to you, and if you're brave enough, you'll leave a comment at the end of this blog posting.

Maybe these words describe me in fact.  

However moving forward and speaking of Basic Grey,  I was finding that I wasn't using all of the embellishments that I had from my Basic Grey packages, simply because I had them stored in a cupboard and it was a nuisance to sort through them

I solved that problem on the weekend by taking a dead corner in my craft room, installing four lineal feet of pegboard which was 54" high and now everything is pegged and visible. 

Randy, Linda's husband, helped me by cutting my 48" of pegboard into the two pieces I needed to fit my corner.  
I cut and painted four strips of strapping, which I screwed to the wall at the height I wanted.  Screwed the pegboard to the strapping and I was good to go.  


Here's the corner with just the pegboard on the wall, I forgot to take a before picture, but you can see the space and visualize a blank wall.  


And now, the pegboard prettily filled so that I can actually see what I have.  

I even had space to hang my extra self healing cutting mat and large plastic ruler below everything.
I'm very pleased with the finished look and now I can see what I have, I'll be able to use it.


I have to tell you that I'm thinking about how to incorporate this idea into my craft room now.  I saw it today on a blog I subscribe to and fell in love with the idea.  What do you think?


Have you found a space in your home for your craft supplies?  Do you have a dedicated craft room 

Do you remember how my sister in law Di shared her crafting room renovation here

Why not share some of your ideas with others who read this blog?  Send us a photo of what you've done or are doing and inspire others to find a small or large spot in their home for their hobby.
                                                  `````````````````````````````

YARN BOMBING IN OTTAWA
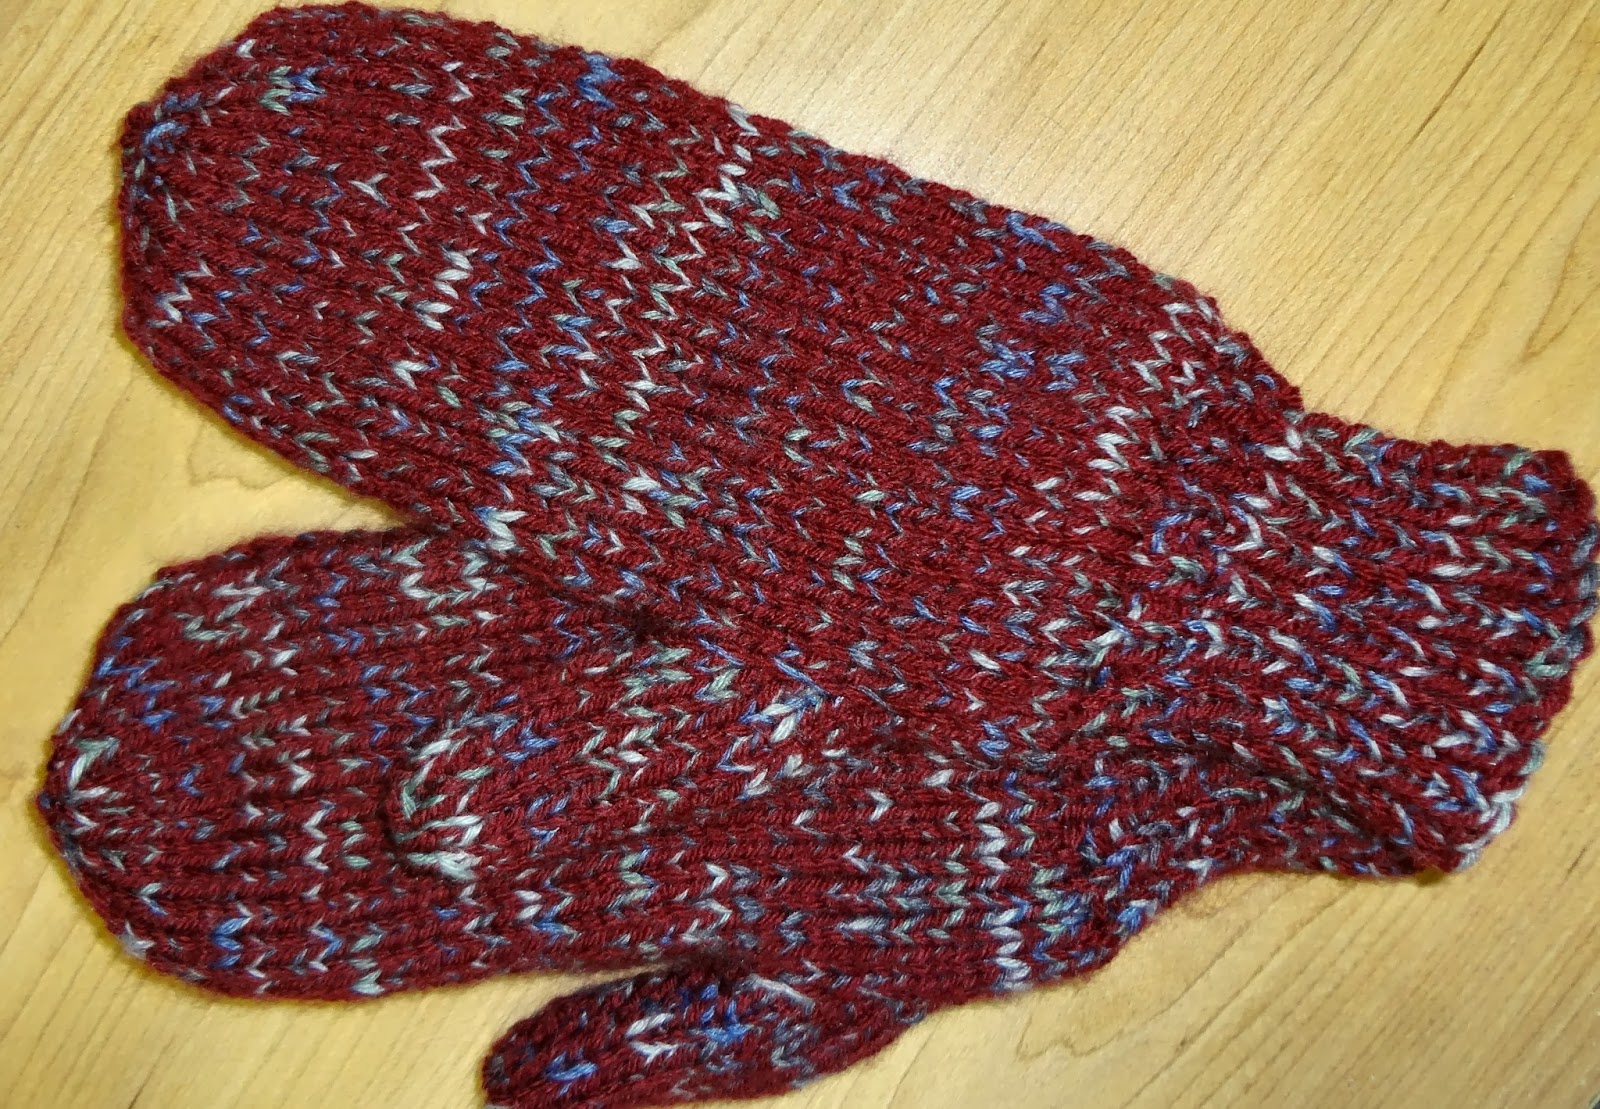
Did you read or hear about the yarn bombing that took place in Ottawa recently?  What a story and what an example we have the opportunity to follow.  
If you've ever visited downtown Ottawa you may well have seen The Valiant's Memorial.  These are statues of some of our Canadian war heroes.  Well these heroes were recently decked out with colorful scarves tied around their necks.  Each scarf had a note on them saying.....

"I am not lost!   If you are stuck out in the cold, 
take this scarf to keep warm.”
The "yarn bombing" as it was being called was the work of a group of knitters calling themselves "Dropping Stitches to Make a Better World".   What a great way of enjoying the craft that you love, and being able to share it to benefit others. We could all do this in our own towns and cities couldn't we.

No we don't have such enormously visual monuments to tie the scarves around, but we all have social networks working to help those who are in need in our communities don't we. A thought to ponder at the very least in this bitterly cold weather we're experiencing.  Children perhaps who don't have proper mittens, hats and scarves as they walk to school.  I can almost guarantee that the secretaries and teachers at most of our schools will  be able to wrap them around a child in need, perhaps only because that child forgot to put them on before leaving home, and shouldn't have to walk home without warm clothing.

You can read more about the article right here and apparently it happens in other cities too.
~~~~~~~~~~

Have you been thinking of Valentines coming up soon? I have been working on a few samples that you can see if you drop into the store.  In the meantime here's a photo or two to get you thinking.  

I was looking at the purple felt flower in the store last week and started to think if it was made in red it would be a nice Valentine brooch on a coat or a scarf as an embellishment.  

This is simply made by cutting six flower shaped pieces, folding them in quarters and attaching them together.  I then sewed three pearls into the centers of three of them, some leaves and a pin-back to the back for a brooch.

The felt, pearls and pin-backs are available at the Craft Nook

The pink flower was what the ladies made in card class last week and they were very pleased with their results.  Again a simple enough project once you know the steps, and an introduction to some quilling as well.  We cut five different scalloped circles with the Spellbinders Scalloped Circle dies.  Then by inking the edges and cutting between each scallop into the centre, shaping, fluffing and gluing them together, the base flower was made.  The centre was created by making tiny cuts into a narrow strip of white card stock and rolling it around a quilling tool.   

The hearts to the side here are both made from layers of felt. 

I began by wanting to make a hand warmer in the shape of a heart and the word "love" on it.  

As with anything that you don't have a pattern for, it takes on a life of it's own as you create it
I added some layers, embroidered my word and then thought....maybe some beads around the one layer.  Oh and then came the little heart beading in the top corner.  I completed it by filling it with rice (ready to heat in the microwave) and blanket stitching all around the outer edge.

Great, I thought, I like this look. Then came my second thought......hmm, if there's any metals in the glass bead to give the shine, then I'm pooched putting it in the microwave.

So, how do you like my fancy pin cushion? 

Now a little older, (the next day) a little wiser, (no beads) I made my heart shaped hand warmer.  A few embroidery stitches and a ribbon for embellishment..........microwave safe.

Envelope Punch BoardAre you registered for the Thursday Night Technique class next week?  I believe Linda said there were only a few spots left.

My plan is to have the ladies play with the We R Memory Keepers envelope punch board. So if you have one, or are thinking about purchasing one, you need to be there to see what you can make beyond envelopes.

It's a pretty neat tool, and those that know me, know that I'm not big on tools, beyond my Silhouette Cameo, Cuttlebug and Score Board that is. Oh, and of course my favourite punches.
Anyway if you don't want to miss out on this opportunity of instruction, make sure you call or email us to grab one of  those last few spots.

I'm looking forward to Wednesday of this week when I can spend some time with my granddaughter Rachel. We are very much alike in so many ways, but none the least in our love of sewing. Rachel holds on to many things of importance to her, such as T-shirts that she has long since outgrown but have a memory to them, or just a design that she loves.  She has had a plan for these shirts for some time now, and they are going to become a quilt.  Before Christmas we began the planning stages for her quilt. It was difficult for Rachel to understand how to sew all these different shapes and sizes together without creating awkward corners. When we were on the Christmas House Tour, she was able to see a beautifully sewn quilt and came to understand how many different shapes are stitched together to form squares which are then sewn into the final quilt.  Though we may not get to the sewing stage on Wednesday, we will spend a few hours "hanging out" together playing with fabric.

Well I hope in this blog posting I've been able to once again inspire you to stretch outside of your comfort zone and try something different perhaps.  To realise you have the ability with your crafting skills to perhaps "pay it forward" in some way, doing a random act of kindness for someone you may don't really know and may never meet again.
If you don't know the concept of Paying it Forward, check it out  here and don't get blown off by the first two paragraphs, continue reading and watch the video.


And the words for the week as we suffer through this hard winter, we can apply this thought not only to the winter weather, but to life in general.....

Until Later....Happy Crafting

Lilian


Tuesday, January 21, 2014

Where Were You?

We had a great time last Friday night, with a group of ladies working on many different projects at our Crop and Craft Night .  Some of them scrapbooking, some card making, some falling in love with Distress Inks for the first time, some creating invitations, but above all, they were all enjoying a lot of laughter together.

Our Friday Crop and Craft Nights afford you the opportunity to learn new areas of crafting, so don't miss out simply because you don't commit to the night.  Jeanetta enjoyed the opportunity of taking cards down from the wall displays and learning how to create them.  Elaine was able to catch up with some cards from previous classes she'd missed.  Jill worked on her Basic Grey pages.  There wasn't an idle hand around the tables as everyone worked, chatted and simply enjoyed being with people who like to create.

I don't think I've shared with you that this year I'm working on my PhD did I? It's going to take a lot of dedication, a tremendous amount of focus, but I've set my sites on the goal and I don't plan to fail. I'm sure once I'm further along the road, I'll find it easier, but right now I tend to become distracted, however I don't plan to fail!  

Have you ever considered the lofty goal of working on your PhD?  I know, I've heard it all before.......I don't have time, I have a full-time job, a household to run, children to raise.  I'm sure though, like me, you meet the criteria and have the supplies to work on many "projects half done," don't you?   

That's where the Crop and Craft Nights work so well.  All you have to do is say every other Friday, I'm going out to work on my PhD. That's my commitment to myself this year and I went to the Crop and Craft Night with a project, but of course I became distracted.  Helped instead with some invitations, some Distress Ink samples....focus!
So tell me, how do you focus on your PhD, or UFO's, or whatever you call them?  I'd love some suggestions to help me focus.

Today I finally finished my husbands double hand mittens.  He was really pleased with the fit of them and figures they'll keep his hands lovely and warm, though hard to pick up a coffee cup whilst wearing them. 

Can't please everyone can you

Though these mittens take a little longer to make, they're well worth the effort for the additional warmth. I showed you the pair I made Linda here.  Just scroll down to the third photo and read how I make them.


Do you recall that Linda knitted "Minion Slippers" for her two girls?  I have been meaning to add that pattern for you, but always seem to run out of time, so here it is this week.
This is a photo she took of the one pair of slipper's and then realised she forgot to embroider the smile on the face, but don't they still look great.
The basic pattern is easy and you can change it up to be whatever you'd like, even adding a crochet flower to the front for decoration.
You need a ball of thick yarn, or two strands of double knitting yarn.  One pair of size 5.5mm needles

Basic Pattern 
Instructions are for Child's size with changes for Women's and Men's in parentheses
Cast on 27 (29 - 35) sts

HEEL:  TOE:
Row 1: this is wrong side - K9(9-11), P1, K7,(9-11), P1, K9,(9-11)  
Row 2: Knit all stitches
Repeat these 2 rows for 5 (6-8) ins., or 2 (2 1/2-2 1/2) inches less than the desired finished length.  
TOE:
Row 1: P1, *K1, P1; repeat from * to end  
Row 2: K1, *P1, K1 repeat from * to end  
Repeat these 2 rows of ribbing for 1-1/2"(2-2)ins ending on wrong side  

First Decrease Row: work ribbing over 7(7-9) stitches, *slip next st onto needle, K1st, then pass the slipped stitch over (psso), K1, K2tog.*, work 3(5-7) sts in rib, repeat the instruction between* once.  Finish row in ribbing:  23(25-31) 
Next Row: Work 7(7-9) sts rib, P3, work 3(5-7) sts rib, P3 finish to end of row
2nd Decrease Row:  Work 6(6-8)sts, * K2 tog, K1, slip 1, K1 psso *, work 1(3-5) sts and then repeat between * once, finish row.  19(21-27)  
Break yarn leaving about 12" for sewing.  Thread yarn into yarn needle and weave through remaining stitches on needle. Pull yarn tightly to close and secure the toe end. Sew from toe edge to ankle about 3(4-5)inches or just enough for your foot to go inside the slipper.  Re-attach the yarn at the heel and sew the back heel seam in an upside down "T".  The two sides stitched together and the sole piece squished to make upside down "T" and sewn up.

When our daughters were young, I made an extra pair of soles for each pair of slippers.  Sewed them on, removing them when they wore out, and replacing them with another pair.  The body of the slipper never wore out, but of course the soles did, so this increased the life of the slippers for them.

If you plan on making a "Minion" slipper then just follow the basic idea in the photo. Changing from blue to yellow just in front of the ankle, and part way along the front, knitting 2 rows of ribbing in black for the strap. The eye was a crocheted circle with a black button sewn on.  Consider too a Googly Eye for added interest.


Are you coming out to Card Class this
Thursday night? There are a few places still available and a warm spot at the table for you to learn something new.  Here's a peek at a little of what we did in the last card class.


The masculine ship was created using the ever popular distress inks changing the kraft paper to look like two entirely different papers.  
One coloured with Walnut Distress Ink and one simply shot through the Cuttlebug embossing it.

With some easy cutting and patterned paper we were able to create two similar, and yet uniquely different cards. Certainly Elaine much preferred these chevrons to some we've presented in the past...easy peasy...done!


We  had a customer in this week in need of help working beads into her crochet project.  She had threaded all the beads onto the crochet cotton, but was having trouble working the bead into the design so that they were visible. Though I'm not a cotton crocheter, with some trial and error we were able to figure it out and she happily went on her way to continue a very beautiful doily with a pineapple design on it, similar to the one on the right.

I mention this because I stood in awe of this crafter's determination.  She had begun to crochet with a very fine cotton, but found it too difficult for her at the moment and had switched to a heavier cotton, though still fine.  My hat was, as I said, already off to her because I find no pleasure in working with such fine cotton. More than that though, I have to dub her with the title of "Crafter of the Week".  Why, you say?  Well she had sliced the ring finger of her right hand (she is right handed) and it was splinted, but she was crocheting some beautiful fine work, only conceding to go to a slightly heavier cotton.  How deserving of a title is that?

Our customers often amaze me with their ability and their willingness to not only ask for help, but to share the projects they are working on, or have completed.  You never know when I may make mention of a conversation that I've enjoyed with one of you as you share with us.

Did you know we have one customer who filled over two hundred shoe boxes last year for the Christmas program.  She constantly knits all year small teddy bears and dolls to add to these boxes.


And now for the embroiders in our midst, here'a a lovely Jacobean design which could be worked in a variety of embroidery stitches.  There are more free designs here for your personal use.  Drop into the store and pick up a booklet with embroidery stitch instructions.


And of course our words for the week.....


Until Later Happy Crafting......

Lilian

Tuesday, January 14, 2014

Wow, That Was Quite the Weather Change Wasn't It?

My sister in law in England is in an area affected by all those floods, though their home is fine. She did say to me when I was showing her all the snow we were getting a week or so ago...at least you can shovel the snow, we can't do that with all the rain.  How true that was, as we found out over the weekend, when our snow turned to rain.

Still I don't think we are suffering as they are in some areas of  England and Wales.  The Bed & Breakfast where we stayed in  Aberystwyth, Wales in April of last year was being battered severely by the waves from Cardigan Bay.  We sat in the bay window of the house in the evening enjoying a cup of tea, but I think a week ago we would have got pretty wet sitting there. Bearing in mind that these are century old homes and not all windows had been replaced.
Here's a You tube video of the area we stayed.  We were in the houses facing you in the distance, about midway and we walked along the promenade where all the waves are battering.

Well ladies I think you will be getting the shortened version  of the blog tonight as it seems in installing a program on my PC, I've made it sick.  I am typing this on my iPad which in itself is fine, but most of my files are on my PC!

Are you joining us this Friday night January 17th for the Crop and Craft night?  I think we may have a knitter or two then as well.  
Speaking of knitting, whilst it was quiet on Friday afternoon of last week, I tried my skill at arm knitting.  Have you tried it yet, it's very popular right now.  I don't think I'll ever be an arm knitter and it was kind of funny as I became a little tangled in the yarn at one point, but I was able to knit up a chunky scarf in about 30 minutes.  You use two strands of a #6 yarn, (we have more coming in at the end of the week), but in the meantime I used one strand of a #6 and two strands of a #5.  A little more complex, but worked just fine as you can see below.
Join us on Friday though and enjoy learning a new craft or completing a UFO.  Yes I know you have them, we all do.  Unfinished Objects are the bane of a crafter's life, because we often pop onto the next thing before the first is finished.
Our other challenge is when we have a creative block and so the craft sits unfinished. That's whats nice about a Friday night Crop & Craft, someone else always has an idea that gets you out of the block.
Don't forget that if you complete one older page from your Basic Gray Page of the Month kits, you'll get the evening at half price.  Make this the year for catching up UFO's.
I  have been very neglectful in sharing a photo that one of our crafters sent us before Christmas so I made myself a special note to make sure I showed you this week.  Candice was very busy making 52 of these trees as table favours for her golfing group.  What do you think...pretty amazing in my opinion.  Thanks so much for sharing Candice.

I'm not sure if Candice hand cut all these trees, or if she cut them on a digital cutter like the Silhouette Cameo. Certainly would have made faster work than hand cutting.  
Do you have a Cameo?  Linda has some very attractive pricing on the two Silhouette machines at the moment so if youre thinking of one, this is the time! 
If you don't know all the lovely things you can create with them, take a moment and drop into the store to ask us about them
Remember how Emily cut some fabric out with my Cameo for her Christmas gift.  You can also cut out heat transfer material to iron onto aprons, tee shirts, or vinyl to have word art on the walls or in frames.  Just about anything your mind can dream up, the Silhouette Cameo or Portrait can cut out. 
Of course they're invaluable when you scrapbook or make cards, and you don't have to buy cartridges!  Not only can you purchase just the embellishment you'd like for your project, you can easily make your own.  It doesn't stop there either, because any True Type font on your computer can be cut with this machine.  A great addition to your crafting supplies.

Here are some great ideas to help you with the journaling on your scrapbook pages....

Make a List.    This is a fairly simple journaling technique that is suitable for use with any type of page theme, for example:
Doing a friendship page – list how you met, where you met, how long you have known each other, include what you like about your friend and why you are both pals.
If you're doing a recipe scrapbook page then make a personal top 10 list of reasons why you like Grandmas chocolate cake so much.  This is very pertinent to my sister's family as they figured out Grammies fudge recipe recently.
Doing a baby layout do a list of baby’s favorite foods, you can even do one for the foods they don't like!  
A variation of this listing technique is to use bullet points to mark each line on your list, giving you an opportunity to emphasize each item of your journaling.  Another bonus with using the list technique is that you do not need to worry about the structure of your sentences or that your journaling makes sense because the list breaks down what you want to say into its basic readable form.  This technique is also called strip journaling, when your short sentences are printed on narrow strips of cardstock or patterned paper.  Drop into the store to see some examples.
Write a Letter.   This is one of those great scrapbook journaling ideas that’s fairly simple to do and its also a lovely, personal way to journal your layouts too.   All you have to do is pretend you’re writing to a friend telling them what is happening in your photographs.  I often say to our scrapbookers, pretend I am standing behind you are you're explaining to me the content of your page. Sent any emails lately? Like letters, emails are also a good source of journaling material that you can use for your layouts.  I've recently been creating some pages using photos I picked up from Facebook.  I used the various posted comments as my journaling, printing the Facebook logo beside the comments.   If you are unsure of your own journaling then doing it in a letter format could help your writing flow more easily, as you describe the people and the events taking place, letting you tell the story naturally and in your own words.
If you are one of those people who find it difficult to begin the journaling process these fun scrapbook journaling ideas will provide you with some basic tips and techniques to help make it easier.  So go on, try out the scrapbook journaling ideas above for yourself and add some stress-free journaling to your pages.  Once you have finished you will see that its been well worth the effort. 
Well for all that I didn't have all the files I wanted to share, I didn't do so bad with content after all.   I was planning on sharing the Minion Slipper pattern that Linda knitted, but that will be something for you to look forward to another week.
I do have to share this lovely photo of Emily though, our frugal shopper.  For a number of years now, my Mother-in-law has sent her great grandchildren a monetary gift for Christmas.  I began the tradition of putting a gift certificate on the tree when they were younger, with the promise of a shopping trip with Great Nanna's money and lunch with me.  It became a special time they looked forward to. Here you see Emily on her shopping trip, writing in her book what she was purchasing so that she wouldn't overspend.  Amazing how much she was able to purchase with her gift money. Lunch is always at the restaurant of their choice, this time it was the Hong Kong Buffet.
And the words for this week are for all those people who are struggling to lose the extra pounds from Christmas eating.....
Until Later, Happy Crafting
Lilian

Tuesday, January 7, 2014

Well a New Year Has Started.

Are you the kind of person that makes resolutions?  I never do, simply because I know I am not of the nature to adhere to them.  I wouldn't be able to stop smoking (thank goodness I never started) or adhere to a diet, I just don't have willpower I guess is what I'm saying.

I was chatting with a sister in law today and she was telling me what she does to fill her days or relieve herself if she's stressed.  Can you imagine...she spends time in the kitchen baking or cooking!  Not me, you'd find me in my craft room creating something or other. How about you, how do you chill out?  (Poor choice of words with the deep freeze we're in again).

Today I was asked by a family member to create a document for them but in agreeing to it, I knew it would cause me to rise to a personal challenge. I would have to learn how to create a PDF document.   I was unaware that with the publishing program that I like to use when creating documents or journaling for my scrapbook pages, I could create a PDF document and therefore it really wasn't a great challenge after all.   No idea what that (PFD) stands for by the way, so I have to go and look it up now.  It's a Portable Document Format...now aren't you pleased to have learned that?  The nice thing about a PDF document is that it's a format that can be read no matter (I think) whether the recipient has the same program the document was made in.  I see possibilities in the future. 

We had a few people email the store last week about the double handed mittens, the infinity scarf and the bag organizer so will try to address those queries.


To Sue regarding the bag organizer.  

Rachel didn't really have a pattern to go by Sue.  On Google images we found a picture. From that she created her own pattern just by measuring Linda's tote bag and deciding how many pockets she wanted in the organizer.  Rachel knew she wanted pockets for Linda's order book, pen and for her phone. Once she knew the width and depth that would fit the bag, she simply cut material accordingly. For the bindings, she cut straight strips measuring two inches wide by the necessary length.  She then pressed the fabric in half to make one inch width, opened it and pressed the raw edges into the fold line making a binding, repressed on the first fold line.  The corners she mitered to make a neat turn. The straps were sewn on after the organizer was complete and they go around the straps on Linda's tote and button back onto the top of the organizer.  Linda was very pleased with the finished result and how her iPad fits in behind the back pocket too.  Why don't you drop into the store sometime and Linda will be happy to show it to you Sue.

Margaret, you were asking about the infinity scarf I knitted for Sandra's gift.  

Linda and I were out shopping for gifts for Sandra before Christmas when I saw a lovely scarf that spoke to me about Sandra.  I knew I could make her one that would have greater meaning to her than a bought one. 
We looked at the scarf in the store and determined it was about 72" x 12" and all worked in stocking stitch. It was fine yarn and very soft, so I chose a baby weight fine yarn.  The scarf we saw was loosely knit, so I chose to use very large needles for this, 10 mm needles in fact. 

You have to know me and know that I don't like to knit on circular needles. My knitting style is to have one needle tucked under my right arm and you can't do that with circular needles. Hence that meant my infinity scarf would be knitted in a long piece and joined on the narrow edge. 
You recall I said that it needed to be 12" wide, so I cast on stitches to that approximate width, for me it was about 50 stitches if I recall correctly. Can you tell this wasn't a precise garment?  Knitting in stocking stitch (one row knit, one row purl) caused the scarf to roll slightly on the outer edges adding to the very soft overall look.  

I had knitted partway in when I thought ...wow this would be nice if I added some small pearl seed beads to it for sparkle (a little hard to see in the photo, but they're there).  I did this, not by adding all the beads at the beginning of the work and drawing them into the work as I needed them (remember I had already begun this project when I got my "brilliant" idea), but by using a sewing needle and thread.  What you do is put your sewing needle through the bead, then through the working stitch you want the bead to go on, then back through the bead gently drawing the knitted stitch through the bead. With this method (we've shown card makers how to thread a ribbon through a small hole in this same manner) you don't have to know how many beads to add to your yarn before you begin your project.  I did however have to go back and hand sew the section that I had worked before I got my light bulb moment.

Once my piece was the length I wanted it to be, 72" in this case, I picked up and worked in the stitches from the cast on row and the row I was knitting and cast them off together.  To cover my seam, I first gathered it in and then knitted a narrow piece, about 6 stitches wide and four inches long sewing that over the gathered seam.
The finishing touch was the crocheted flower with pearl embellishments in the centre and a pin back finding on the back.  I've had that pattern for eons, so have  no idea where it came from. It's worked like this and I'll put it on a tutorial page for future reference.

Crochet Flower…4 layers of petals
I used a 4.5 mm crochet hook

Ch 5. Sl st in 1st ch to make a ring or make magic ring
Round 1:  Ch 1. (SC, ch 3) 5 times in ring. Join with a sl st to 1st ch made at the start of this rnd
Round 2:  Ch 1, (SC, 5 DC, SC) in each ch-3 sp around. Join with a sl st to the 1st ch made at the start of this rnd
Round 3: Ch 1. Working behind the petals made in Rnd 2, (SC in next ch-3 sp of Rnd 1, ch 5) around. Join with a sl st to the 1st ch made at the start of this rnd
Round 4: Ch 1, (SC, 9 DC, SC) in ch-5 sp around. Join with a sl st to the 1st ch made at the start of this rnd. Join with a sl st to the 1st ch made at the start of this rnd
Round 5: Ch 1. Working behind petals made in Rnd 4, (SC in next ch-3 sp of Rnd 1, ch 7) around. Join with a sl st to the 1st ch made at the start of this rnd
Round 6: Ch 1, (SC, 13 DC, SC) in ch-7 sp around. Join with a sl st to the 1st ch made at the start of this rnd
Round 7: Ch 1. Working behind petals made in Rnd 6, (SC in next ch-3 sp of Rnd 1, ch 9) around. Join with a sl st to the 1st ch made at the start of this rnd
Round 8: Ch1. (SC, 17 DC, SC) in ch-9 sp around. Join with a sl st to the 1st ch made at the start of this rnd
Fasten Off.   

I then sewed pearl beads at the base of each petal and one in the centre. There's one on display in the store if you'd like to see it.  I also added a pin back to it so it can be easily taken off and put back onto the scarf.


For all of you that were interested and intrigued by the double hand mittens. I've made zillions of these for my daughters and their friends when they were all little.  I say zillions because they all had three or four pair as they were so thick that when they got wet playing in the snow, they took some time to dry.

The simplicity of them is that you simply knit up the one mitt, then from the inside of the mitt at the top of the rib you pick up the stitches and knit a lining mitt only.  

What I chose to do with these was to use a double knitting weight yarn as well as a sock weight yarn, knitting them together.  
In these mittens of Linda's  I used a burgundy double knitting weight and a variegated sock yarn. The reason I do this is that the sock yarn has some wool content which gives the mittens greater warmth (ask Emily and Linda about that for confirmation).  
So if you have a favourite mitten pattern then try doing this yourself.  Feel free to drop into the store for greater clarification should you need it.  I'll be happy to give you an impromptu knitting lesson as I did our customer Sandra the other day.
I'll type out the basic pattern (no lining) that I've used forever and place it on a tutorial page for future reference.

I know Linda expects that I will be putting the Minion Slipper Pattern on this week, but I will add that next week.

I had the pleasure of a visit with one of my sister's recently and she mentioned to me that she wasn't able, didn't know how, to post a comment on the blog.  She's no longer a favourite sister as she said this in front of Linda who has been telling me the same thing for ages!  It seemed easy to me (no doubt as making a PDF document seems to some, but not me until today), so I didn't take heed or address the concern. However once Evelyn mentioned this, I not only showed her how to do it, (she posted a comment on the tutorial page for the Christmas Ornament, go take a look), but I also resolved to be a little clearer for everyone.  

So here goes. If you receive the blog in your inbox each week because you've signed up to receive any changes to the blog, you will have to click on the title in your blog email which will then take you directly to the blog.  This blog today is titled, "Well a New Year Has Started".  Last week was "The End of Another Year".


Once you are at the blog, then you scroll down to the bottom, below where I sign off and you see some thumbnail pictures of previous postings. Below that you will see a brown bar, see the photo to the right, that says posted by Craft Nook at whatever time I posted...(don't look too closely or you may see what time I am up) then it may show No Comments or it may have a number in there of comments already made.  


Just click on the comment wording and it will bring up a comment box like this to the left here.  
All you have to do then is type your comment into the box, including your name in the comment box so we know who you are. 
Below the comment box you will see "Comment as" with Craft Nook in there, but there's a drop down arrow to the right where you can choose how you will comment.  
In most cases I expect that "anonymous" is the choice you will make, unless you have a blog of your own or some other type of address. Once you choose "anonymous" (don't forget to have signed your name in the comment box), simply press publish and you're done.  We'd love to hear from you if only to tell us what you're up to, so don't be shy, please leave a comment or two on what catches your interest or what you are doing to "chill out".
Marta sent us a lovely email telling us what she had done with the tags she received  in the Christmas Tag Swap she participated in.  I'll try and remember to copy it into the comments so that you can all see what good use she put them to.  I can be so totally inspired by some of the ways our customers craft that I love to share these ideas with all of you.

I know this was a long blogging and I hope you were able to stay with me, because I  have another story to share with you.   

I mentioned to you a while ago how Emily had wanted to learn to sew on the sewing machine.  She has a small crafting sewing machine that used to belong to her sister Jessica at one time. Emily was so determined that she planned out, with Linda's help, how to make a gym bag for herself.  
When she was at my house one day she showed me her fabric and told me of her plan.  It was obvious to me that she had thought this out well, but the fabric she had available to her was not a good size for her plan.
So off we went into my fabric stash...oh the joy on her face to be allowed to choose from the "stash". After looking through a variety of colours and textures, she chose the appropriate fabric for the job and off we went to the sewing machine.  

More joy when she found she was going to use the "big" machine. She listened well, she measured, she cut, she sewed and here's the final result of her very first sewing project. One where she planned the pattern and executed the plan.   She was going to embellish it further, but to date has chosen not to.

And finally, (though I'm not really finished, I'll have to save it for next time, or maybe I'll put an extra blog into the week) my words for today...I  have so many!!  

We all know that any form of crafting be it needle arts, paper arts of any sort, painting, or general crafting is an art form, so with that in mind, remember that.......especially all you Canadians...


Until Later....Happy Crafting

Lilian